Announcement - Add / Edit an Announcement
Blog - Managing Blogs and Subscribers
Blog Manager for Authors
https://help.clubexpress.com/Content/Blogs/Blog_Manager_for_Authors.htm?cshid=2509
Within a Blog, a Blog author can select the Manage Posts link in the top right corner. 
or select Blogs within their membership profile
Each post can be edited or viewed. You can view comments, push an update to social networking, or delete the post completely.
The grid lists each post in descending date order, showing the post title, visibility status, date of publication, and how often that post has been viewed.
Buttons are available to view a list of subscribers, search blog posts, edit the properties of the blog and add a post.
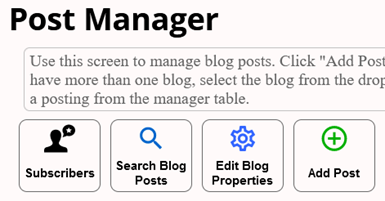
Select Subscribers to view a list of subscribers, with member and non-member subscribers listed separately and the ability to remove each subscriber individually.
Select Search Blog Posts to search within a blog by title, description, author and tags.
Select Edit Blog Properties to change the author, title, description, status and visibility of the blog, and whether comments are allowed.
Select Add Post to add a blog post using the content editor.
Specify the title and author for your post, any tags that apply to it, the summary and an image to be used on social networking websites to represent this post.
Note: You may add a maximum of five (5) tags to any single post.
If a summary is not specified, the system will use the first 200 characters of the post itself, along with a "More..." link. Finally, choose a post status:
- Draft (not published) - the post will be hidden from view and will not be published. The draft can be revised and viewed by blog authors and administrators.
- Ready to Publish - you will be prompted to select a publish date and time. Leave both fields blank to publish the post immediately. To schedule the blog post for a future date and time, enter the date and time in the fields. The time will respect your club's time zone.
- Offline - use this status to deactivate a post which was previously visible.
You will use our content editor to create the blog post, with its available tools for creating web content, including formatting and layout tools, the link builder and the ability to insert photos and videos. Click Save to save your new blog post or Cancel to close the dialog without creating a new post.
Maintain Options
The following options can be found in the Maintain column:
|
Maintain Options
|
|
Icon
|
Description
|
|
 (Edit) (Edit)
|
Edit this blog entry.
|
|
 (View) (View)
|
View this blog post.
|
|
 (Comments) (Comments)
|
View and edit Comments posted on this blog entry. This icon will only display if comments have been added to the blog.
|
|
 (Share) (Share)
|
Share this post on your club’s social networks, including Facebook and Twitter. This icon will only appear if the blog post is flagged to be visible.
|
|
 (Delete) (Delete)
|
Delete this blog entry. You will be prompted to confirm this action. Any posted comments will also be deleted.
|
Viewing and Editing Comments
Click the Comments icon to view and edit comments.
Comments are listed in descending date order, 50 comments per page with paging options. Click the Edit icon to modify a comment that might be inappropriate. Click the Delete icon to remove it completely; you will be asked to confirm this action.
Share this Post
Click the Share this Post icon to share a blog post on your club’s Facebook page or Twitter feed.
At the top will be one or more checkboxes, representing the social networks where your club has a presence and which are defined on the Control Panel – Communications – Setup – Social Networking screen.
The Text dialog will change depending on which social network(s) you select. Facebook allows up to 300 characters and Twitter up 120 (actually more, but the link to the event requires 20 characters.) When more than one option is checked, only the shortest length will be available.
Enter whatever text you need to communicate the details to your audience, then click the Share button to post this blog entry to your club’s social network(s), or Cancel to close the dialog without posting.
Note: When you connect to each service for the first time, you will be prompted to authorize ClubExpress to generate posts in your account. This process is handled slightly differently by each service.
See Posting to Social Networks.
https://help.clubexpress.com/Content/Posting_to_Social.htm
Board Change - How to forward title email to personal member email
Board Change - How to update the Contact Page
Communique - How / where to upload the latest Communique
Documents - How / where to upload a document needed for the website
Email - How to create an email blast
Email - How to set up default email id for system emails
Event - Add a Skipper Sail
Quick Events are used to create Skipper sails. Quick Events are easy to define and easy to register for:
- Only one screen to define the event
- Only one screen to register for the event
- One day only
- Whether the registrant list should be shown, and to whom
- No event-specific questions
The following settings can be defined:
- Title – shown on the calendar;
- Short Description – shown as a tooltip on the calendar;
- Category – controls the color coding.
- Visibility – who can see this Quick Event
- Contact Person - Click the Select link to select a member, then specify what contact information should be shown for that member and whether he or she should be notified when someone registers for the Quick Event. You can also Remove a contact person.
- Specify the date and start/finish times for this Quick Event.
- Specify how registration should be handled:
- Are Cancellations allowed? If so, a Cancellation Date field will appear.
- Should the Registrant List be visible, and to whom?
- Location – this section behaves the same way as location in a regular event. You can also select from one of the predefined locations that your club or association often uses.
Go to the Event calendar by hovering over the “Event Signup and More” menu which will display Event Sign-Up options (Event Calendar, Event Overview).

Click on Event Calendar.
If your screen looks like a calendar (Grid View), you’ll see

If your screen is a list of events (List View), you’ll see

With either view, there are additional blue buttons to the right.

Click on the “Add Quick Event” button to view the “Create Quick Event” screen.
Any fields with a red dot are required. Set the Category, Visibility, Mobile Channel as shown.
Add additional fields as appropriate.

Set the Cruise Captain to yourself by clicking the “Select” button. A selection screen will be displayed.

Enter a partial last name and click Search. Select a name from the list displayed and click on the “Select” button.

Once you’ve selected a Cruise Caption, some additional email and phone options are displayed.
To set the Event Date, click on the calendar icon. To set the From/To Time, click on the clock icons.
Please use the Registration option, Required by Close Date.
Decide what’s the latest date someone can register for the sail (Registration Close Date).
Decide what’s the latest date/time someone can cancel their registration (Cancellation Cutoff Date/Time).
Set Registrant Type to Active Members.
Set Registrant List Visibility to “Members Only”.
Set Maximum Guests to 0.

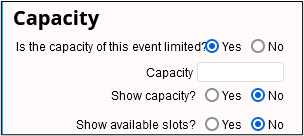
If you select Yes for the Capacity, additional fields are displayed.
Add additional Location fields as appropriate. The Location website is not required.
Click the Save button at the bottom of the screen to save this Quick Event and add it to the calendar.

The difference between Quick Events that Skippers add vs. Club “Full” Events that the Fleet Captain adds:
|
Feature
|
QuickEvent
|
(Full) Event
|
|
Select a category
|
X
|
X
|
|
Visibility
|
Only (1) visible to everyone; (2) visible to everyone, details for members only; (3) visible to members only;
|
Only (1) visible to everyone; (2) visible to everyone, details for members only; (3) visible to members only; (4) visible to committee(s); (5) not visible
|
|
Event Web Page
|
X
|
X
|
|
Repeating Dates
|
|
X
|
|
Multiple Days
|
|
X
|
|
Short Description
|
X
|
X
|
|
Formatted Description
|
|
X
|
|
Event Coordinator
|
Only one (1) contact allowed
|
Multiple contacts allowed
|
|
Location
|
X
|
X
|
|
RSVP Registration
|
X (see below)
|
|
|
Cancellation cut-off
|
X
|
X
|
|
Cancellation Policy
|
|
X
|
|
Registrant Type
|
Only (1) everyone, or (2) members only
|
Registrants based on interest, committee, member type, subgroup, mailing list category
|
|
Allow guests
|
X
|
X
|
|
Charge a fee
|
|
X
|
|
Track attendance
|
|
X
|
|
Ask registrants questions
|
|
X
|
|
Configure automatic reminder emails
|
|
X
|
|
Blast emailing with event-specific distribution lists
|
X
|
X
|
|
Waitlist
|
|
X
|
|
Share event to social media
|
|
X
|
Event - Cancel my registration for an event
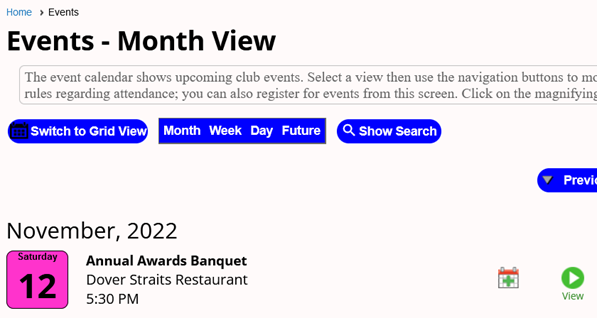
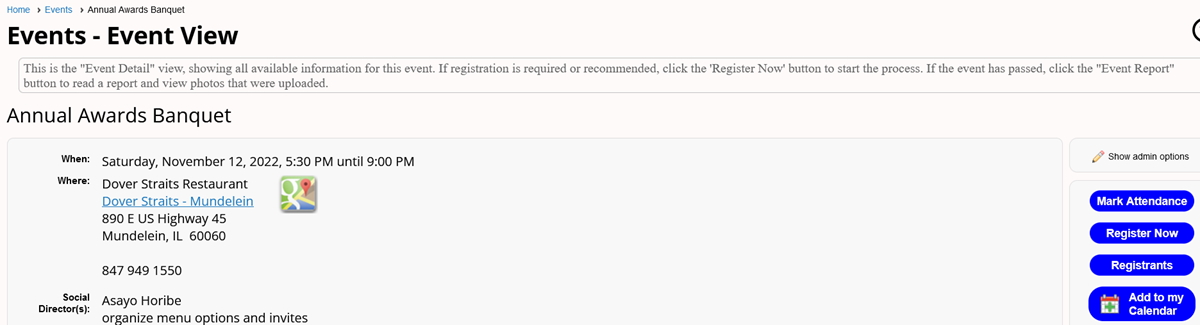
To cancel your registration for an event, select the event by either clicking on the Event title or the View button.

To the right you should see these 3 options. If you don’t see the “Cancel Registration” button, the cancellation date has passed. You should contact the Social Director to inform them of your cancellation.

When you click on “Cancel Registration”, this message is displayed.

Event - Mark Attendance for a Meeting
You will first have to register each individual member for the event, then mark all members in attendance in 1 step. There are 2 methods to get to the Event Admin screen.
- Find the Event on the Event Calendar, Click on the event title, then click on

or
- Go to Control Panel > Website > Website Modules > Events Search for the Event (you might want to use the Category filter and / or the Date range or Event Status of Active) and click on the pencil next to the desired Event.
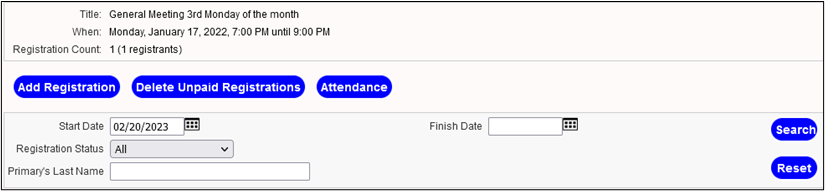
- In the Events Admin panel, click the Registrations button to register each attendee.
- For repeating events, the date listed will be the first occurrence. Enter the desired event date in the Start Date range and click Search.
- Click

- Select Sign up member
 then click Select
to enter a partial last name  then click Search
- Select a name from the Search results (can only select 1)
 and click Select
- Then click Next to continue

- Uncheck “Send Confirmation Emails to Event Registrant” then click “Complete Registration” button.

Repeat the above steps for each individual member. Once all members are registered, then you need to mark registered members that were in attendance as follows:
Return to the Event Admin screen for a specific event either via the Event Calendar or the Control Panel > Website > Website Modules > Events, then click Attendance.
- For a repeating event, Select the Date to Record. The date will be the day following an event.
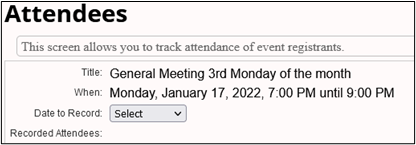
- Select “Mark attendance for registered members, non-members & guests”

- Click on “Check all”

- Read the displayed message, “uncheck” any registrants if necessary, then click Save.

Event - Quick vs Full Event
Event Coordinator = Cruise Captain / Skipper / Fleet Captain; Location = Harbor
|
Feature
|
QuickEvent
|
(Full) Event
|
|
Select a category
|
X
|
X
|
|
Select a subgroup
|
X
|
X
|
|
Visibility
|
Only (1) visible to everyone; (2) visible to everyone, details for members only; (3) visible to members only;
|
Only (1) visible to everyone; (2) visible to everyone, details for members only; (3) visible to members only; (4) visible to committee(s); (5) not visible
|
|
Event Web Page
|
X
|
X
|
|
Repeating Dates
|
|
X
|
|
Multiple Days
|
|
X
|
|
Short Description
|
X
|
X
|
|
Formatted Description
|
|
X
|
|
Event Coordinator
|
Only one (1) contact allowed
|
Multiple contacts allowed
|
|
Location
|
X
|
X
|
|
RSVP Registration
|
X (see below)
|
|
|
Cancellation cut-off
|
X
|
X
|
|
Cancellation Policy
|
|
X
|
|
Release Agreement
|
Default agreement only, and only using Quick Release
|
Use default policy, or create a new policy for the event
|
|
Registrant Type
|
Only (1) everyone, or (2) members only
|
Registrants based on interest, committee, member type, subgroup, mailing list category
|
|
Allow guests
|
X
|
X
|
|
Charge a fee
|
|
X
|
|
Track attendance
|
|
X
|
|
Ask registrants questions
|
|
X
|
|
Configure automatic reminder emails
|
|
X
|
|
Blast emailing with event-specific distribution lists
|
X
|
X
|
|
Waitlist
|
|
X
|
|
Share event to social media
|
|
X
|
On the Registration panel for a QuickEvent, you can select RSVP Only for the Registration question. When you do, the panel changes to:

Check off which RSVP Responses you want to display.
If you only want to record those people who can come, check the Yes option and leave No and Maybe unchecked.
You can optionally enable a Comments panel where people can enter notes as part of their RSVP.
RSVP Scope controls who can RSVP: everyone or active members only.
RSVP List Visibility controls whether members and the public can see who else is coming. The list is displayed in categories for each enabled response.
Maximum Guests allows people to RSVP and bring one or more guests.
Enable Quick Release is the same option described above.
When someone responds “No”, no further action is required; their response is immediately recorded in the database.
When someone responds “Yes” or “Maybe”, and the guests and comment options have not been enabled, their response is also recorded immediately.
When someone responds “Yes” or “Maybe”, and the guests and/or comment options are enabled, a dialog will popup to collect this information before the RSVP can be recorded.
Categories: Registration:


You can define three types of entries on the calendar:
An Event has different registrant types, each with its own fee, event-specific questions, a capacity and a deadline for registering.
All of the configuration options are available for events. Only administrators or event calendar coordinators can create this type of event.
- A Single Activity Event is something that everyone attends, at the same location and at the same time, such as a committee meeting or a lunch time lecture, with no optional side activities.
- A Multi-Activity Event is an event with options. It could be a multi-day conference where people can attend different parts of the conference, with optional side-events and special activities for spouses. Or it could be a single ride or run but with options for different distances, or optional shirts that participants can purchase, etc. When you define the multi-activity event, you will be asked to define different activities or items, each with their own description, location, registrant types, and fees. Only administrators or event calendar coordinators can create this type of event (Fleet Captain, Skippers, Social Director, possibly other Board members).
A Single Activity Event can be converted to a Multi-Activity Event, and vice versa if there is only one activity.
- A QuickEvent is a simple event with just one registrant type, no fees, and no event-specific questions. It happens on one day only. It can be open to members and/or non-members and guests are allowed, but registration is much simpler and only requires a single page. You can optionally allow members to define QuickEvents (with or without approval.) QuickEvents can be converted to single activity events.
- A Notification is an entry on the calendar that people do not register for. Rather, it tells them about a deadline or milestone, something they need to know about that is date-constrained in some way. Or it could be an event created by another organization (with a link to the other website.)
After entering and saving a Quick Event, use the Convert icon  (2nd icon within QuickEvent Tools) to convert the Quick Event to a full Event if that’s needed / preferred.

- Enter the title of the event. This title will be shown on the calendar grid and in list views, as well as in the heading of the event detail view. There are separate short description and long description fields, so the title should be succinct.
- The Short Description is used in the iCal/vCal feature, when users add the event to their personal calendars. It’s also used in the main calendar grid, as a popup tooltip when the mouse is hovered over the event title.
- A much longer and fully formatted description can be defined once you’ve created the event.
Event - Register for a Sailing Event
Member - How to add a Prospective member
When someone expresses interest in the Club, we can add them as a Non-Member to retain their name and contact information.
At a later date, they can be converted to a Member or simply have them click on the "Join Now" button to sign-up for Membership and pay their membership fee.
Click on Control Panel (near your name in the upper right corner)

Click on the People tab
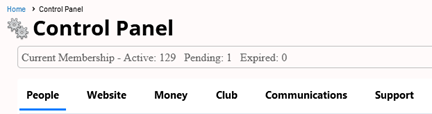
Click on the People Manager module 
Click on the Add Non-Member button 
Add the information for the Prospective Member. Only the fields with a red dot are required i.e. First Name, Last Name, Category.
Even though most fields are optional, it may be helpful to provide any known information or Notes.
For Category, select “Interested Persons”.
Most individuals will be from Illinois but some may be from Wisconsin or some other state.
For the Timezone, select Central Time.
Enter a phone number (home phone) and / or Mobile phone.
If they have indicated they are okay with receiving text messages, check “I agree to receive text messages from the Northwest Sailing Association”. If they have not granted this permission, do not check this option.
If they provided their email id, enter their email id and check the “Allow Emails” field.
If they provided “How did you hear about us?”, select the appropriate option i.e. Friend or Acquaintance, Online Search, Facebook, Meetup, Member, Other, Sail Chicago, Strictly Sail, or Yachtapalooza.
Once the Prospective Member joins the Club via the "Join Now" button, you’ll want to drop their name from the Non-Member list.
Perform a People Manager Search for Non-members 
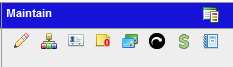
For the desired name, click on the “More Options” icon  within the Maintain field
  and select “Drop”.
Click OK when prompted  .
.
There might be one additional message
 .
.
Click OK.
Member - Change my User Name and / or Password
If you don’t remember your user id or password, we can’t provide your password do you’ll have to reset it.
1A) Use the “Forgot My Username/Password” button. This option assumes you have an email id included in your profile. If you don’t have a valid email id, use the “Contact Us” option within the Help menu to email the Technology Director or Membership Director (or any board member) for further assistance. You will also need to know the exact spelling of your first and last name. You'll be prompted for one or the other.
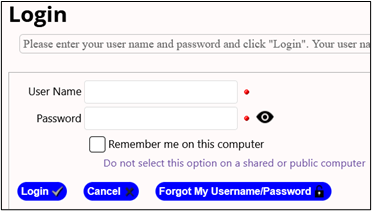
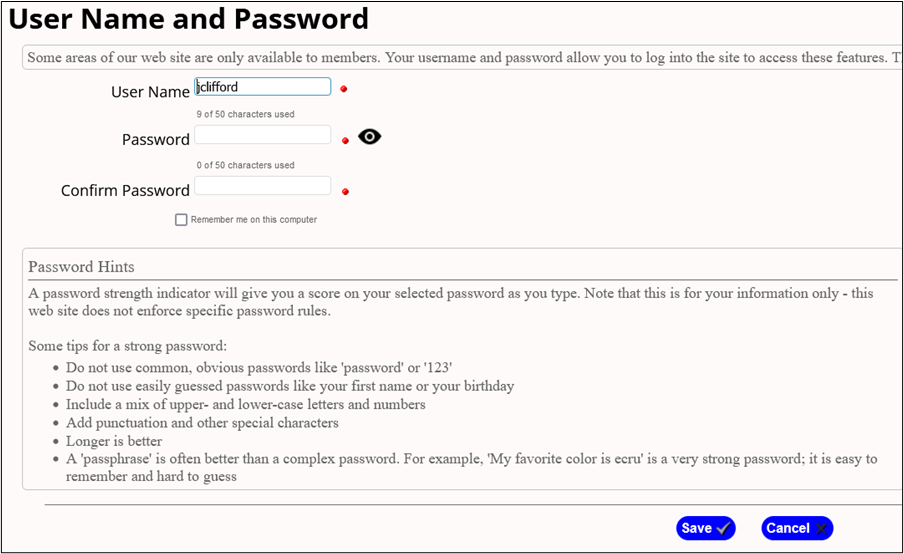
If you use the “Forgot My Username/Password” button, you will receive a system email with a link to the “User Name and Password” screen.
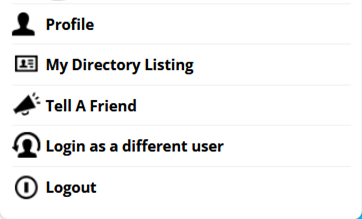
1B) If you’re already logged in and wish to change your User Name and / or Password, hover over your name in the upper right corner and click on the “Profile” link.
Within your profile, click on the “User Name / Password” section.

2) Enter a User Name and Password of your own choosing and click Save.
Member - How to update payment by check for a New Member
When someone joins the club via online & pays by check (at the meeting or mail a check to the PO Box, not at a meeting), we need to record receipt of their check.
Click on Control Panel (near your name in the upper right corner)
Click on the People tab
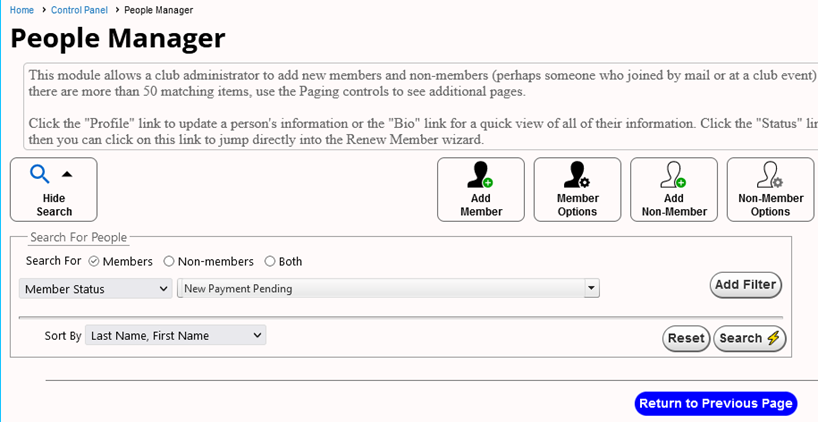
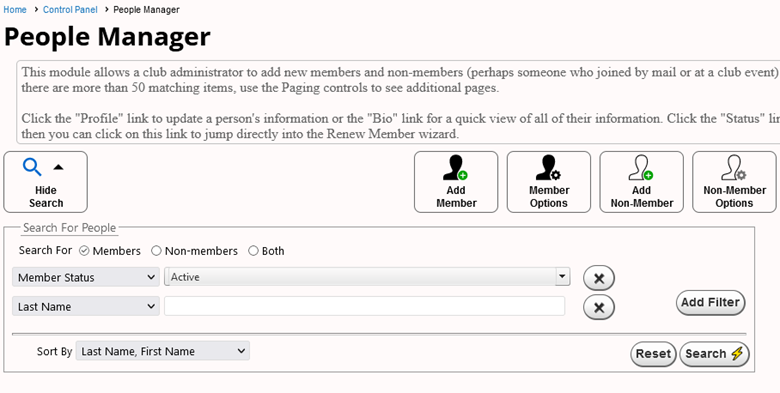
Click on the People Manager
Set the filter to search on Member Status = “New Payment Pending”

(Add or remove filters as needed) 
Click Search.
Any results found will have a dollar sign $ icon within the Maintain column. Click on the $ icon.
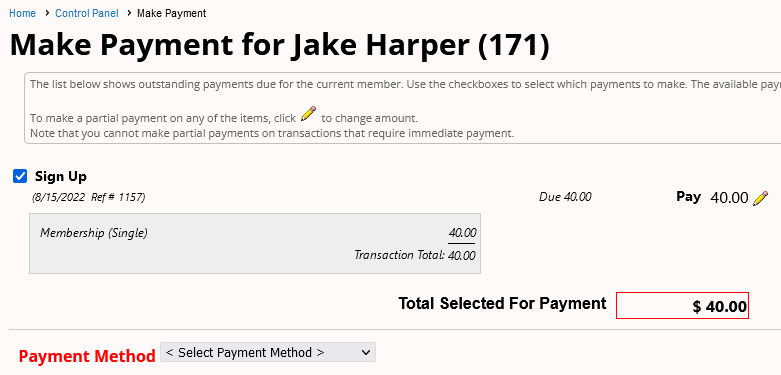
We can indicate that we received a check by selecting the Payment Method from the drop down list.
The Payment Method drop down list consists of:
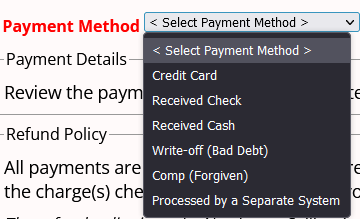
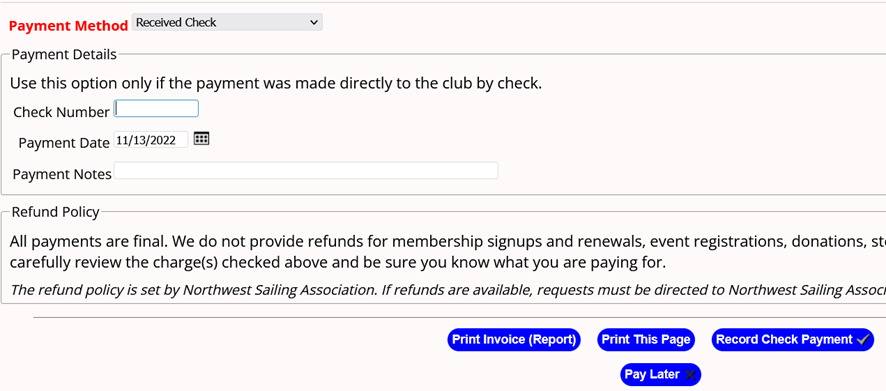
Select "Received Check" and enter the payment information: Check#, Payment Date, and optional Payment Notes
You have the option to "Print Invoice" or "Print This Page" but you must click on Record Check Payment.
The Member’s status should now be “Active” vs. “Pending”.
Member - How to record payment by check for Membership Renewals
When someone renews their membership & pays by check (at the meeting or mail a check to the PO Box, not at a meeting), we need to record receipt of their check.
Click on Control Panel (near your name in the upper right corner)
Click on the People tab
Click on the People Manager
Set the filter to search on Member Status = “New Payment Pending”
(Add or remove filters as needed). 
Click Search.
There will be a dollar sign icon within the Maintain column. Click on the $ icon to record a payment.
We can indicate that we Received payment by selecting the Payment Method from the drop down list.
The Payment Method drop down list consists of:
Select "Received Check" and enter the payment information: Check#, Payment Date, and optional Payment Notes
You have the option to "Print Invoice" or "Print This Page" but you must click on Record Check Payment.
Member - How to renew my membership
Hover over your name in the upper right corner to edit your membership Profile (click on Profile)
Even though the Club calendar is February 1 thru January 31, you can renew the next year’s membership as early as September 1.
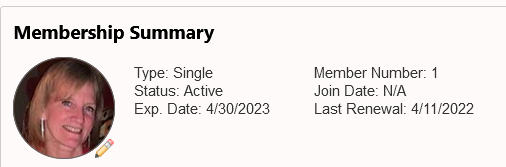
Within the Membership Summary section of your Profile, you can find your current membership expiration date. Please renew prior to May 1 since the Sailing calendar typically starts in May.
You’ll receive a couple of renewal reminders in the Spring with a final renewal notice on May 15.
To the right of the Membership Summary is a link to renew your membership.
Member - How to update my profile
Hover over your name in the upper right corner to edit your membership Profile or perform any of the other options listed below the Profile link
Officer Reports - How / where to upload the latest (Purser, Yeoman)
Payment - How does an Event Administrator record an event payment
- View events on the calendar. Click on the Event Title or View button
- Click on “Show admin options” (above blue buttons on the right)
- Click on “Registrations” button
- Search for Registration Status = “Open” and click Search button (or display all registrations and focus on “Open” registrations)
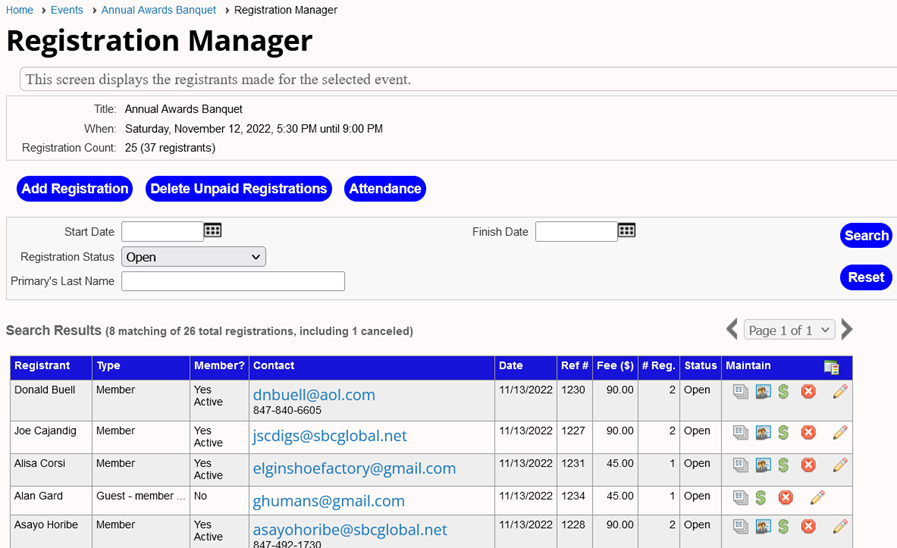
- Click on the Payment icon
 to enter the payment information.
- Select a Payment Method from the drop down menu.

- If the payment is by check, select “Received Check” from the drop down menu, enter the check number, payment date & optional note, then click “Record Check Payment”.
Payment - How does the Membership Director record an event payment
When someone registers for an event & pays by check (at the meeting or mails a check to the PO Box), we need to record receipt of their check.
Click on Control Panel (near your name in the upper right corner)

Click on the People tab

Click on People Manager
Set the filter to search on Member Status = “Active” and at least a partial last name.
If the member owes a payment, a payment icon  will be within the Maintain column. Click on the icon to enter the payment information.
Select a Payment Method from the drop down menu.

If the payment is by check, select “Received Check” from the drop down menu, enter the check number, payment date & optional note, then click “Record Check Payment”.

Payment - How does the Purser record a payment
When someone registers for an event and pays by check at a later date (at the meeting or mail a check to the PO Box, not at a meeting), we need to record receipt of their check.
Click on Control Panel (near your name in the upper right corner)
Click on the Money tab

Within the Admin Functions, click on the Transaction Search module.

Select the filter option “Unpaid Only” and any other options. If you only want to select 1 member, enter a partial last name, then click search.
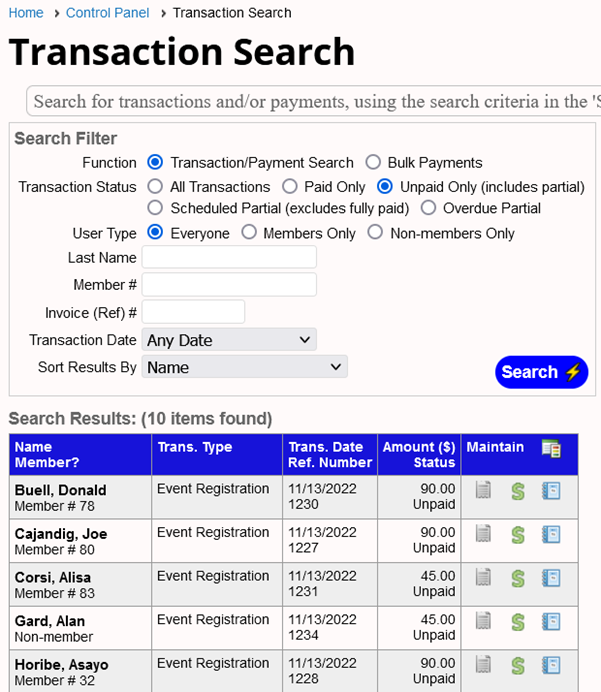
The Trans Type might be “Event Registration” or “Renew Membership”. Focus on the “Event Registration”.
Within the Maintain column, click on the dollar sign, Make Payment icon
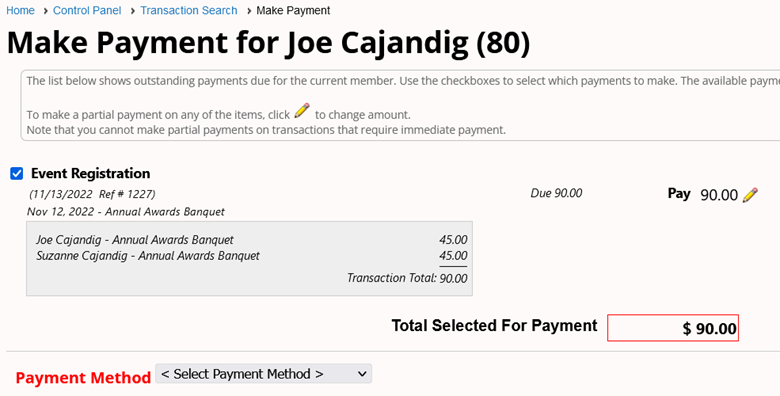
Select the Payment Method from the dropdown list. The Payment Method drop down list consists of:
For checks, select "Received Check" and enter the payment information: Check#, Payment Date, and optional Payment Notes

You have the option to "Print Invoice" or "Print This Page" but you must click “Record Check Payment” or for credit cards, “Submit Payment”.
Photos - How to upload photos from an event
Keep in mind you can include photos within your “After Event” article. Then members don’t have to open the Photo album and the article.
It is nice to add the photos to a photo album to help up build a photo gallery.
- Click on Control Panel (near your name in the upper right corner)
- Click on the Website tab

- Click on Photo Album (not Photos)

- Scroll down to the Photo Album that was created for your event. The photo album name begins with the year, month, day i.e. 220924 for September 24, 2022.
- For the photo album you want to update, click the pencil (Edit) icon from the Photo Album Manager

- A screen similar to the following is displayed:

- Typically you’ll use the “Add One Photo” or “Add Multiple Photos”.
The other options are:
- Select Photos - if the photos were previously uploaded but not added to your Event’s Photo Album.
- Display Sequence - to reorder the sequence of the photos within the Photo Album
- Configure Album – to change the properties of the Photo Album
- When you’re finished adding photos, you can go to the Menu and click on “Event Signup and More” to view the Event Reports submenu
- Click on After Event Reports
- Scroll down to your event i.e. , and click on the “Photo Album” link for your event to scroll thru the photos within your Photo Album.
Report - What Reports are available for an Event
If you have Coordinator / Admin rights to an Event, you have have an extra link available to you, "Show admin options" (pencil icon):

. Click on this link to see all 9 of the Event Admin options.
Click on the "Report" icon to see the list of available reports for an Event.
Report options 1 - 9 Report options 10 - 18 Report options 19 - 27


Report options 28 - 30

Attached is a sample report for some of these reports. We suggest choosing 1 of these 13 options.
Report option 2 (see page 1),
Report option 3 (see page 2),
Report option 4 (see page 3),
Report option 6 (see pages 4-5),
Report option 7 (see pages 6-9; same report as option 6 but with page breaks),
Report option 8 (see page 10),
Report option 9 (see page 11),
Report option 10 (see page 12),
Report option 11 (see page 13),
Report option 12 (see page 14),
Report option 13 (see page 15),
Report option 14 (see page 16),
Report option 15 (see page 17).
sample Event reports
Report - How to update the Membership Report, Directory - Booklet format
- Click on Control Panel (near your name in the upper right corner)

- Click on the People tab
- Click on the Reports icon

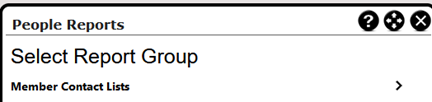
- Within the People Reports, click on the arrow symbol > for "Member Contact Lists" which will display a list of reports.
- Select the "Membership Directory" to generate the Booklet format of the membership directory and click Next.
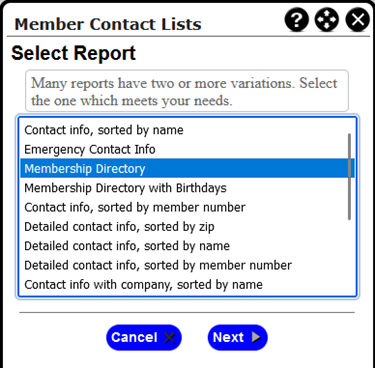
- Select "Adobe Acrobat (PDF)" for the Output Format and click "Run Report".

- When viewing the report, click on the download symbol
 in the upper right corner and save the report onto your computer.
- To upload the file you just saved on your computer, go to the Control Panel and click on the Website tab.
- Click on the Document Library icon

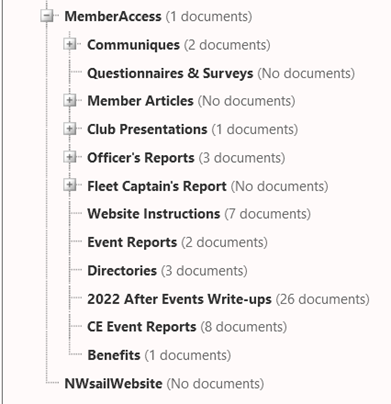
- Within the folder structure, click on the plus symbol + next to the MemberAccess folder to display a list of subfolders.
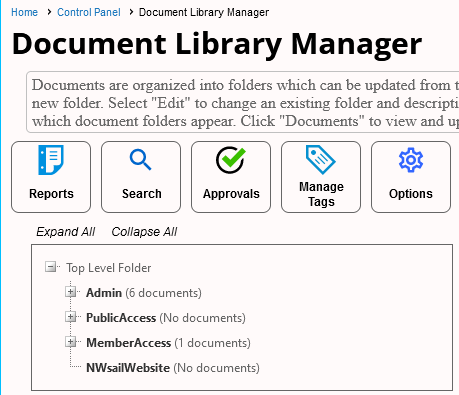
- Select the Directories subfolder.

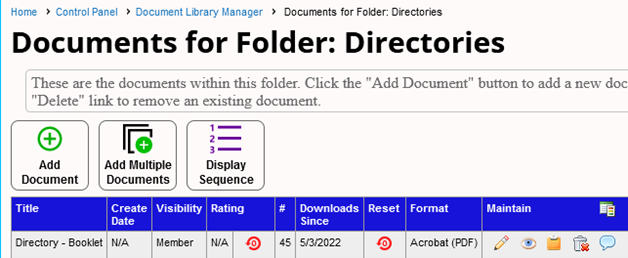
- Right click on Directories to see the options and click on "View Documents"

- For the “Directory – Booklet” report, click on the pencil / Edit icon within the Maintain column.
- Select the "Update" checkbox next to the Filename (near the bottom)..
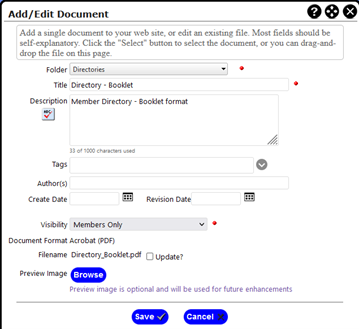
- Click on the “Select” button (next to Select Document, below Filename, near the bottom).
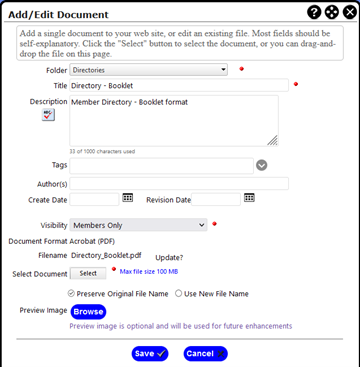
- Go to the folder on your computer where you saved the report (see step 7) and select / open the report. Click Save on the “Add/Edit Document” panel.
- The latest version on the report can now be viewed within the menu Members > Directory - Booklet
Upload - How to upload an After Event article
Note: your article should be saved as a PDF (Adobe Acrobat) document vs a Word document.
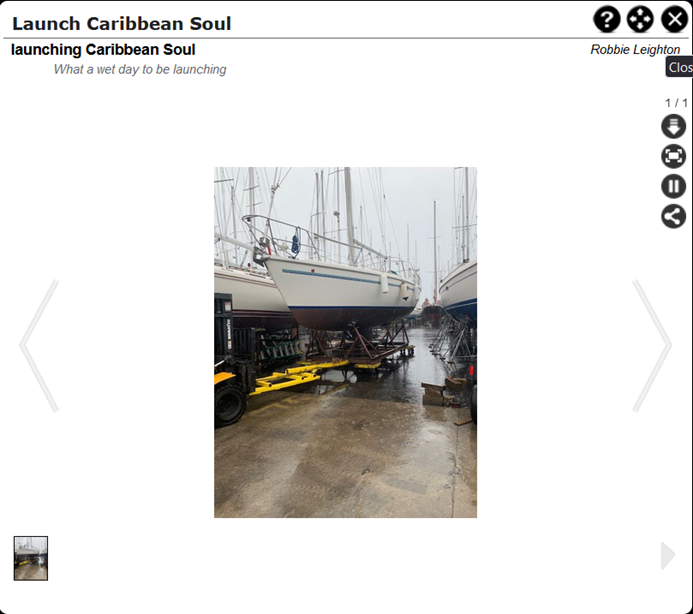
Keep in mind you can include photos within your article. Then members don’t have to open the Photo album and the article. It is nice to add the photos to a photo album to help up build a photo gallery. See "2022 Launch Caribbean Soul" as an example:
- Click on Control Panel (near your name in the upper right corner)
- Click on the Website tab
- Click on Document Library

- This screen displays a tree structure of folders and sub-folders. Click the [+] symbol to expand the “MemberAccess” folder.
- The list of subfolders for “MemberAccess” may vary from this screen print but look for the “20yy After Events Write-ups” where yy is the current year.
- Hover over the folder which highlights it with a green background. While the folder is highlighted, right click your mouse. You will see a popup menu with some of the following options:

- Select View Documents to view the list of documents within the folder.
- Scroll down to the Event you want to update. A dummy article was initially posted for the event to hold a spot for the real article.
- For the article you want to update, click on the pencil (edit) icon on the right side of the screen
- A screen similar to the following is displayed:
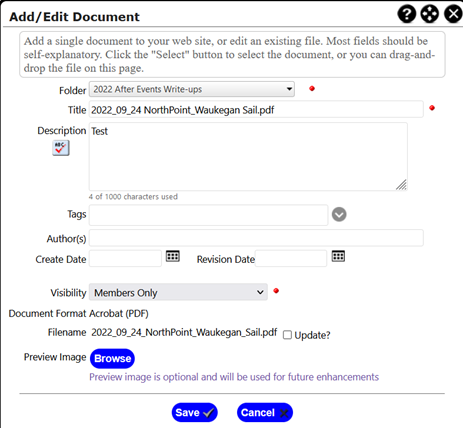
- Update the description (or leave it blank) i.e. same as the Title or something more descriptive.
- The Visibility should be set to Members Only
- After the filename, there is a checkbox to Update the article file. Select the Update checkbox.
- The screen is refreshed to show the Select button.
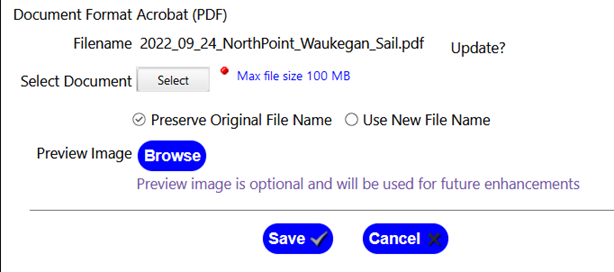
- Click on the Select button then locate your PDF file from your local hard disk and click Open.

- Do not use the blue Browse button to upload an image (picture) file.
- Click Save to upload the document or Cancel to close the dialog without uploading.
- You can preview your article here by clicking on the eyeball (preview) icon
or
- Go to the Menu and click on “Event Signup and More” to view the Event Reports submenu
- Click on After Event Reports
- Scroll down to your event i.e. 2022_09_24 Northpoint_Waukegan Sail, to view your report.
Website - Clear Cache in Every Major Browser